


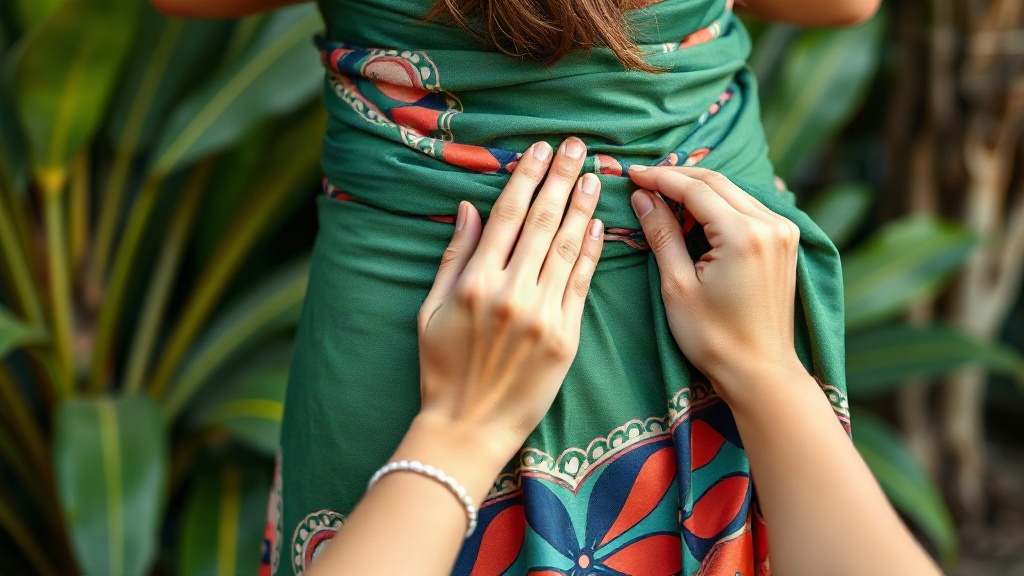
You pull a long rectangle of fabric from your bag, and it looks like a bedsheet with potential. Yet the sarong has wrapped waists from Bali to Brazil for centuries, and that same simple cloth can become a dress, a skirt, or a beach cover-up in under a minute. The trick is knowing where to hold, fold, and tie.
Quick answer: Wrap the fabric around your body with the top edge at your waist or chest, overlap the ends by about a hand’s width, and secure the knot at your side or front. The overlap and a double knot hold the wrap in place; the placement and fabric length decide whether you get a skirt, dress, or halter style.
This guide covers the tools to gather, four wearable wrap styles, plus the tips and mistakes that decide whether your sarong stays put all afternoon or slips on the first step.
What you need before starting
Gather a few basics first, and every wrap will sit better and stay secure longer.
Check the fabric for small holes or frayed hems before you head out, since a weak corner can tear once tension is applied. If your sarong has fringed edges, trim any loose threads, as long strands tangle in knots and make them hard to undo. A quick press with an iron on low heat also helps stiff fabric lie flatter.
A sarong in the right size
A standard pareo measures roughly 150 cm by 115 cm (about 60 by 45 inches). That size wraps a skirt around most adult bodies and still leaves enough fabric for a halter dress. A shorter or narrower piece works as a headscarf or bandeau but limits your options. If you are buying new, hold the fabric up against yourself: the long edge should reach from your waist to below mid-calf.
Fabric that grips rather than slides
Lightweight cotton, rayon, and viscose hold knots well and feel cool in heat. Slippery satin or silk looks lovely but loosens with movement, so save those for styling where you can pin the fabric. Test grip by crumpling a corner in your fist; if it springs open immediately, expect to retie it often.
Two small safety pins
A pin at the overlap point, hidden inside the fold, stops the top edge from sagging. Choose nickel-free pins if you have sensitive skin, and keep them away from sheer fabrics that snag. A single large brooch can replace pins on dressier wraps and doubles as decoration.
A supportive swimsuit or fitted base layer
Sarongs are usually semi-sheer in bright sunlight. Wear a swimsuit, bandeau, or fitted top underneath for halter and strapless styles. This layer also gives you something to tuck the fabric into, which adds stability.
Optional extras that help
- A thin leather belt to cinch a strapless dress at the waist.
- A hair tie or elastic band to gather fabric at the back for a fitted look.
- Flat sandals for beach wraps; wedges work once the knot sits high.
New cotton sarongs can be stiff and bulky at the knot. Wash and dry them once, or scrunch them in your hands for a minute, so the fabric drapes softly and ties tighter.
Step-by-step instructions
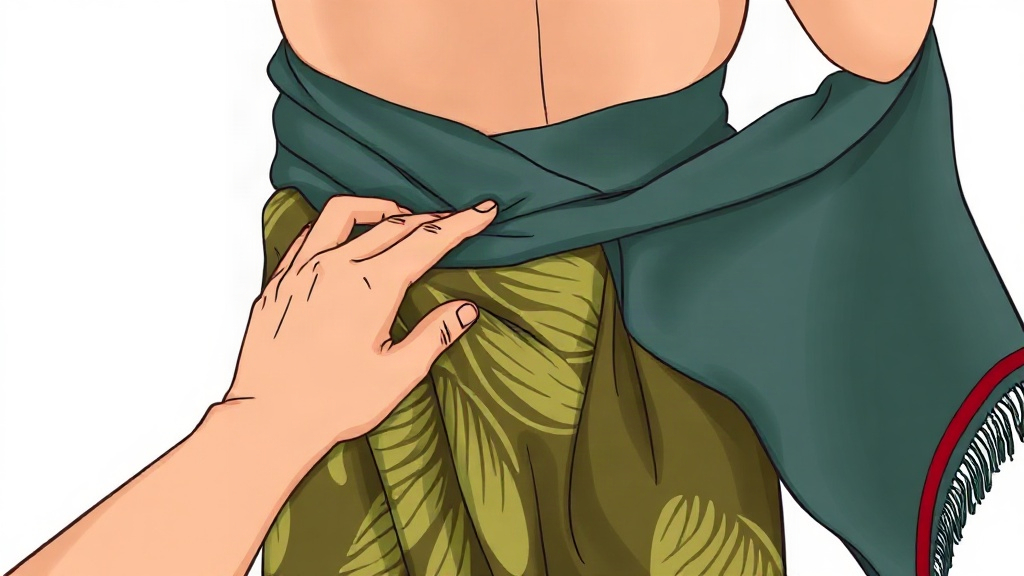
Four wraps cover most situations. Each one takes under a minute once you have practiced the folds.
Whichever style you choose, keep the long horizontal edge as your anchor line, since it gives you a straight reference to check against as you wrap. Before tying, glance down to confirm that both ends hang at the same length.
Step 1: Prepare and position the fabric
Hold the sarong behind your back with the long edge horizontal. Decide your height: waist level for a skirt, chest level for a dress, hip level for a relaxed beach wrap. Check that the fabric hangs evenly on both sides before you wrap. This alignment prevents one side riding up later.
Step 2: Wrap the classic skirt
Bring both ends to the front and cross them so they overlap by about 15 cm (6 inches). Pull gently so the fabric sits snug but still lets you sit down. Tie the top corners in a double knot, then tuck the loose tails inside the waistband. Outcome: a knee-length or midi skirt that stays closed when you walk.
Step 3: Create a strapless dress
Start with the fabric at your armpits and the long edge running horizontally across your chest. Wrap the ends to the front, overlap them, and tie a firm double knot just above your bust. Pull the top edge up slightly so it covers your bra line. Outcome: a tube dress suitable for poolside lunches and beach bars.
Step 4: Tie a halter dress
Hold the sarong behind you at chest height, then bring the top corners over your shoulders and cross them at the back of your neck. Tie a knot there and adjust the front drape so it covers your torso evenly. Outcome: a halter style with an open back, ideal for hot days when you want more coverage than a bandeau.
Step 5: Fold a secure head or shoulder wrap
Fold the sarong in half diagonally to form a triangle, then roll the long edge until it fits your head or shoulders. Tie the ends at the back with a double knot and tuck the tails. Outcome: sun protection for your neck and a styled finish that matches your outfit.
Give the wrap a firm tug and take five steps in place. If the knot slides, retie it with an extra loop. A loose knot fails fast on stairs and uneven sand.
Tips for better results
Small adjustments separate a wrap that looks styled from one that looks improvised.
Angle the knot slightly upward rather than straight across; an upward tilt keeps the fabric from sagging as gravity pulls on the tails through the day. For halter styles, cross the straps lower on the neck so the weight sits on your shoulders instead of pressing on your collarbone. Keep a spare hair tie in your bag for quick re-securing.
Match the wrap to the occasion
A high knot at the waist reads dressier; a low, loose knot looks casual. For dinner, choose a darker sarong, tie the knot at your side, and add a belt. For the beach, a front knot at hip level keeps sand out and lets you move freely.
Use the fabric’s pattern to your advantage
Batik and floral prints hide wrinkles better than solid light colors. Place the boldest part of the pattern at the front or on one hip, and keep the knot on the plainer side. This balances the look and draws the eye where you want it.
Control length without scissors
Shorten a long sarong by folding the top edge down twice before wrapping. Fold about 10 cm (4 inches) per fold. This raises the hem without altering the fabric and lets one sarong serve as both a maxi skirt and a mini.
Keep the knot comfortable when seated
Tie side knots slightly forward of your hip bone so they do not press into a chair back. For long meals or car rides, a front knot with flat tails sits more comfortably than a bulky side knot.
Pack and refresh between wears
Roll sarongs rather than folding them; rolling reduces creases and saves space. A quick steam in a bathroom or a light spritz of water and a shake releases travel wrinkles. Wash cotton and rayon in cool water and line dry in shade to protect the dyes.
Comparison: knot placement options
The table compares three common knot positions and what each one suits.
| Knot position | Best for | Trade-off |
|---|---|---|
| Front center | Skirts, quick changes | Bulk can show under fitted tops |
| Side hip | Dresses, dressier looks | Can press into chair backs |
| Back | Halter and strapless styles | Harder to retie alone |
Side knots flatter most body shapes, but front knots are the fastest to adjust. Pick based on how long you plan to wear the wrap.
Common mistakes to avoid
Most sarong failures trace back to a handful of fixable habits.
Tying the knot at the exact point where the fabric is thinnest, such as a hemmed corner, weakens the hold; fold the corner into a small triangle first, which gives the knot more bulk to bite into. Rotating your wrap between wearings also helps, since tying at the same spot every time stretches and frays that section faster.
Ignoring wind is another frequent oversight. On breezy beaches, a loose front knot catches air like a sail, so shift the knot to your side or add a belt over the wrap to hold the fabric flat against your body.
Skipping the double knot
A single bow or loop loosens within minutes of walking. Always finish with a double knot, then tuck the tails. If the fabric is slippery, add a safety pin through the knot’s center for extra security.
Overlapping too little
An overlap under 10 cm (4 inches) leaves gaps when you sit or bend. Use a full hand’s width or more, and pin the inner layer if the fabric is thin. More overlap also means fewer awkward peeks.
Wrapping too tightly
A sarong tied like a corset restricts breathing and rolls down at the waist. Leave room to slide a finger under the waistband. Snug is enough; the fabric should move with you, not grip you.
Ignoring the base layer
Sheer fabric in direct sun shows everything underneath. Choose a swimsuit or fitted top that matches the sarong’s tone, and check in a mirror under bright light before heading out.
Wearing the wrong fabric for the activity
Silk and satin slip during swimming and dancing. Cotton and rayon stay tied through both. Save slippery fabrics for seated events or styles secured with pins.
Wet cotton knots tighten and can be hard to untie later. Rinse the sarong in fresh water after swimming and loosen knots before they dry completely.
Forgetting to check the back
A wrap that looks perfect in front can gap at the back, especially in halter styles. Ask a friend to check, or use a mirror at two angles before you leave.
FAQ
How much should I expect to pay for a good sarong?
Simple cotton sarongs often cost $15 to $40, while hand-dyed batik or silk pieces run higher. Price usually reflects fabric and print method rather than size. A mid-range cotton pareo is the most versatile first buy.
Can I wear a sarong if I am plus size?
Yes. Choose a larger piece, roughly 170 by 115 cm, and wrap with a wider overlap. Side knots and halter styles flatter many body shapes, and a belt adds definition at the waist.
How do I keep a sarong from falling down?
Use a double knot, overlap the fabric by at least 10 cm, and pin the inner layer. Cotton grips better than satin. Test with a short walk before committing to a long one.
Is a sarong appropriate outside the beach?
Yes, with the right styling. A dark cotton sarong tied as a midi skirt with a belt and sandals works for casual lunches and resort dinners. Save halter and strapless wraps for poolside settings.
Conclusion
Learning how to wear a sarong comes down to three habits: align the fabric before wrapping, overlap generously, and finish with a double knot. Once those are automatic, you can switch between skirt, dress, and halter styles in under a minute. Start with the classic skirt using a cotton pareo and two safety pins. Practice the front and side knots at home, then test the wrap with a short walk before you wear it out.
